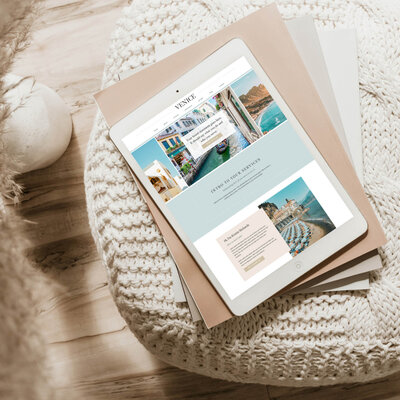


Travel advisor website planning should start long before you choose a template. If you’re building your first website or redesigning one your business has outgrown, it’s tempting to start with the fun part.
You look at website templates. Save websites you love. Think about colors and fonts. Maybe you open your homepage and start moving things around.
And suddenly, your website project feels much bigger than expected.
Because you’re not just trying to design a travel advisor website.
You’re simultaneously trying to figure out your positioning, ideal client, website pages, copy, photography, branding, tech, services and approximately 47 other decisions.
That’s the fastest way to make a website project feel completely overwhelming.

Instead, plan your travel advisor website before you start designing it.
Whether you’re creating your first travel website or redesigning an existing one, there are eight things I’d get clear on first:
- Your website strategy and goals
- Your ideal client
- Your brand positioning
- Your website pages
- Your website systems and tech
- Your visual and photography direction
- Your website copy and content
- Your project organization
Once those pieces are mapped out, choosing a template or beginning the actual website design becomes significantly easier.
The first step in travel advisor website planning is deciding what your website actually needs to accomplish.
1. Define the Goal of Your Travel Advisor Website
Before you think about pages, photography, fonts or website platforms, zoom out.
What does your travel advisor website actually need to accomplish for your business?
Your website isn’t simply a place to list your travel planning services. It should help potential clients quickly understand who you are, what you do, who you help and why they should trust you.
Your goals might include:
- Generating more travel inquiries
- Establishing credibility
- Attracting more aligned or higher-end clients
- Clearly communicating your travel planning services
- Showcasing your travel specialties and expertise
- Giving referrals a professional place to learn more about you
- Building your email list
- Selling hosted group trips
- Increasing visibility through blog content
- Educating potential clients before they inquire
You can have several goals, but identify one primary website goal.
Then ask yourself two important questions.
What should a potential travel client understand within 60 seconds?
Imagine your ideal client lands on your website and spends only one minute there.
What are the three most important things you want them to understand about your travel business?
Not everything you could possibly tell them.
The three things that matter most.
What is the primary call to action on your travel website?
What do you ultimately want visitors to do?
Submit an inquiry? Schedule a consultation? Complete a trip-planning form? Join your email list? Explore an upcoming hosted trip?
Your website can contain multiple links and calls to action, but there should be one obvious primary next step.
Those decisions become a filter for everything else you build.
Want to map this out instead of keeping it all in your head?
Our free Before You Build (or Rebuild) Website Planning Workbook for Travel Advisors walks you through the entire website planning process step by step.
2. Define the Ideal Client for Your Travel Advisor Website
One of the easiest ways to end up with a generic travel advisor website is trying to make it appeal to everyone who likes to travel.
You don’t need to choose one hyper-specific traveler and refuse to work with anyone else.
But you do need to know who your website is primarily speaking to.
Think beyond age and income.
Ask yourself:
- What type of traveler do I most want to work with?
- What types of travel do I want to become known for?
- What does my ideal client value when planning travel?
- Why are they hiring a travel advisor instead of planning themselves?
- What might make them hesitate before hiring an advisor?
- Why should they choose me?
Perhaps your ideal clients value convenience and time savings. Maybe they want expert recommendations, exclusive access, unique experiences or someone who will handle every detail.
Then consider what differentiates your travel business.
Your experience, planning style, connections, specialties, approach, personality and professional affiliations can all play a role.
You don’t need perfectly polished website copy yet.
You need clarity about who you’re talking to before you decide what you’re going to say.
3. Clarify Your Travel Brand Positioning
Before deciding what your travel advisor website should look like, decide what your business should feel like.
If someone visited your website and then described your travel business to a friend, what would you hope they say?
Maybe:
Elevated. Warm. Sophisticated. Approachable. Editorial. Adventurous. Personal. Refined. Luxury-focused.
Now flip the question:
What do you NOT want your travel brand to feel like?
This can sometimes reveal more than asking what you like.
Maybe you want your brand to feel:
- Luxury-focused without feeling stuffy.
- Sophisticated without feeling corporate.
- Playful without feeling juvenile.
- High-end without feeling inaccessible.
Your brand positioning should then inform your website’s copy, photography and visual direction.
Because effective travel advisor website design isn’t simply about making your business look attractive.
The design should visually reinforce how you want your travel business to be perceived.
Website structure is an important part of travel advisor website planning because every page should have a clear purpose.
4. Decide Which Pages Your Travel Advisor Website Needs
Before designing your homepage, map out your entire website structure.
What pages should a travel advisor website have?
Most travel advisor websites should consider some combination of:
- Home: An overview of your business, who you serve and how you help
- About: Build connection and credibility with potential clients
- Services + Packages: Explain your travel planning services, inclusions and applicable starting fees
- Approach / Process: Explain the value of working with a travel advisor and what clients can expect
- Destinations / Specialties: Showcase the destinations, experiences or types of travel you specialize in
- Hosted Group Trips: Feature upcoming hosted or pre-planned trips, if applicable
- Blog / Travel Resources: Share expertise and create useful content
- Contact / Inquire: Give potential clients a clear next step
- Free Resource / Email Opt-In: Build your email audience
- FAQs: Answer common questions before someone inquires
- Testimonials / Client Stories: Demonstrate your expertise and client experience
- Team: Introduce additional advisors or team members, if applicable
- Privacy Policy + Terms: Include appropriate legal pages
That doesn’t mean every travel advisor needs every page.
More pages do not automatically create a better website. Every page should have a reason to exist.
What if you’re redesigning an existing travel advisor website?
Don’t automatically rebuild every page you currently have.
Audit the existing website first:
- What should stay?
- What could be removed or combined?
- What new pages are needed?
- Which existing pages need the most attention?
Sometimes a website redesign requires adding something. Sometimes it requires simplifying.
5. Map Out Your Travel Website Tech and Systems
Your website doesn’t operate by itself.
It connects to the systems you use to actually run your travel business.
Before you start building, map out your website technology, including:
- Website platform: Showit, Squarespace, Wix, WordPress or another platform
- Domain registration: Where your website domain is registered
- CRM / intake system: Such as TravelJoy, Travefy, Tern or WeTravel
- Email marketing platform: Where new subscribers are added
- Appointment scheduler: Such as Calendly or Acuity
- Forms: CRM forms, newsletter forms and lead magnet forms
- Blog: Whether you’re starting one or migrating existing content
The goal isn’t to make the technology complicated.
It’s to know what needs to connect to what before you’re halfway through the build trying to remember where you bought your domain three years ago.
There’s more to plan than choosing a website template.
Exactly.
That’s why we put the process into one place.
Website strategy. Positioning. Pages. Tech. Branding. Photography. Copy. Organization.
6. Plan Your Travel Advisor Website Branding and Photography
Now we can get into the pretty part.
But even your website visuals should begin with strategy.
Check your existing travel branding
- Before building your website, take stock of what you already have:
- Do you have a primary logo?
- A defined color palette?
- Brand fonts?
- Brand guidelines?
- Does your existing branding still represent where your travel business is going?
- Or has your business evolved enough that your branding needs attention before the website does?
Plan your travel website photography
Don’t choose travel photography simply because:
Ooh, pretty.
Instead, think about what your imagery needs to communicate.
Ask yourself:
- What destinations do I want to feature?
- What types of travel do I want to sell more of?
- Do I want people represented in my photography?
- Who should those people be?
- What experiences do I want potential clients picturing themselves having?
- What overall feeling should my photography create?
A luxury resort communicates something different from an African safari lodge. A couple dining overlooking the Mediterranean communicates something different from a multi-generational family on the beach.
Your photography helps potential clients understand what kind of travel belongs in your world.
Create a website image wish list before sourcing photography so you’re choosing images intentionally rather than randomly.
7. Gather Your Travel Advisor Website Copy and Content
You do not need to write your entire website in one sitting.
Start by taking inventory.
Your travel advisor website content may include:
- Business and contact information
- About bio or brand story
- Services and package details
- Starting planning fees, when applicable
- Travel planning process
- Travel specialties and destinations
- Client testimonials and reviews
- FAQs
- Professional affiliations
- Certifications, awards or press
- Social media links
- Inquiry form questions
- Lead magnet or email opt-in information
- Hosted group trip information
- Blog content
Figure out what you already have, what needs updating and what needs to be created.
Build a testimonial bank before designing your website
Don’t wait until you’re halfway through your website build to hunt through emails, Google reviews and old client messages.
And don’t only look for testimonials that say:
“We had the best trip!”
That’s lovely feedback, but the strongest testimonials often help prospective clients understand why hiring a travel advisor was valuable.
Look for feedback about:
- Your expertise and recommendations
- How easy you made the planning process
- Your attention to detail
- How you handled something unexpected
- The time or stress you saved
- Personal touches
- Why working with you was worth it
Those stories show potential clients what having you in their corner actually looks like.
8. Organize Your Travel Advisor Website Project
Finally, put everything in one place.
Create one master website folder with subfolders for:
- Branding
- Brand photography
- Travel photography
- Website copy
- Testimonials + reviews
- Affiliations + credentials
- Downloads + resources
- Blog content
- Legal documents
Then create one master website copy document rather than scattering pages across different Google Docs, emails and Notes.
When you’re ready to design, you want to be designing.
Not hunting for files.
Not deciding what you meant six weeks ago.
Not searching your camera roll for that one photo you’re absolutely certain you saved somewhere.
Organization isn’t the glamorous part of website design.
It is, however, the part Future You will be annoyingly grateful for.
Should You DIY Your Travel Advisor Website or Hire a Website Designer?
Once you’ve planned the website, you can make a much more informed decision about how to build it.
There are generally four paths:
Update your existing website.
Keep the foundation and update the design, content, pages or functionality.
Build your website yourself.
Choose a website platform and create the site from scratch.
Customize a professional website template.
Start with an existing design and customize the branding, photography, copy and content for your travel business.
Hire a professional website designer.
Hand the strategy, design and build over to someone who can guide you through the process.
There isn’t one correct choice.
Your existing website, budget, timeline and how hands-on you want to be should all factor into the decision.
Plan Your Travel Advisor Website Before You Build It
Notice how little of this process involved choosing fonts or arranging your homepage? That’s intentional.
The website is the output. The thinking comes first.
Before you build or redesign a travel advisor website, get clear on:
- Your website strategy and goals
- Your ideal client
- Your brand positioning
- The pages you need
- Your website tech and systems
- Your branding and photography
- Your copy and content
- How you’ll organize the project
Once those decisions are made, the website design process becomes significantly easier.
And that’s exactly what Before You Build (or Rebuild) was created to help you do.
Get the Free Website Planning Workbook for Travel Advisors
Instead of reading this article and then opening a blank Google Doc wondering where to begin, use the workbook to actually work through each step.
You’ll map out your:
- Website strategy + goals
- Ideal client + positioning
- Website pages
- Systems + tech
- Branding + visual direction
- Website photography
- Copy + content
- Project organization
So when you’re ready to build your website, you’re ready.
Frequently Asked Questions
What should a travel advisor website include?
A travel advisor website will typically include a Home page, About page, Services or Packages page, Approach or Process page, Destinations or Specialties page and Contact or Inquiry page. Depending on the business, it may also include hosted group trips, a blog, FAQs, testimonials, team information and an email opt-in.
What should I do before building a travel advisor website?
Before designing your website, define your website goals, ideal client and brand positioning. Then map out the pages you need, your technology and integrations, visual direction, photography, website copy and project assets.
What should the main goal of a travel advisor website be?
The primary goal depends on the travel business. A website may be designed to generate travel inquiries, establish credibility, attract higher-end clients, communicate planning services, showcase specialties, build an email list, promote hosted trips or educate potential clients. Choose one primary goal to guide the website strategy.
Should a travel advisor use a website template or hire a designer?
Either can work. The right choice depends on your existing website, budget, timeline and how hands-on you want to be. Travel advisors can update an existing website, build from scratch, customize a professionally designed template or hire a website designer to guide the process.
What photos should a travel advisor use on their website?
Choose website photography based on the destinations, types of travel, experiences and clients you want your business to attract. Consider whether you want lifestyle imagery with people, destination-focused photography or a mix, and include professional brand photography when appropriate.